

3: Variables in Flowcharts#
Note
The flowchart for this tutorial is available at Zenodo and also can be directly loaded into SEAMM by opening from Zenodo.
Introduction#
In the previous tutorials, you learned how to set up a flowchart, execute a job, and inspect the results using the Dashboard. That is a good start, but if you want to run calculations on several molecules it is tedious to have to edit the flowchart and change e.g. the SMILES string for each molecule. In this tutorial you’ll learn how to use variables to make the first flowchart more general, able to run different molecules easily.
We want to make a flowchart like this:

The flowchart#
This is the flowchart from the tutorial 1: A First Calculation with two changes: the addition
of the control parameters step, and changing the from SMILES step to use a
vaoriable.
Editing the Flowchart#
Let’s start with the original flowchart and edit it to get the new one. (If you don’t
still have the flowchart, jump back to 1: A First Calculation and create it again. It will be
quick this second time.) First we want to add the control parameters step. Drag the
from SMILES step to the right to get it out of the way. Click the left mouse button
on the from SMILES step. Its outline will turn red. With the mouse button held down,
drag it a bit to the right. Next, delete the connection from Start to it by
right-clicking on the arrow:
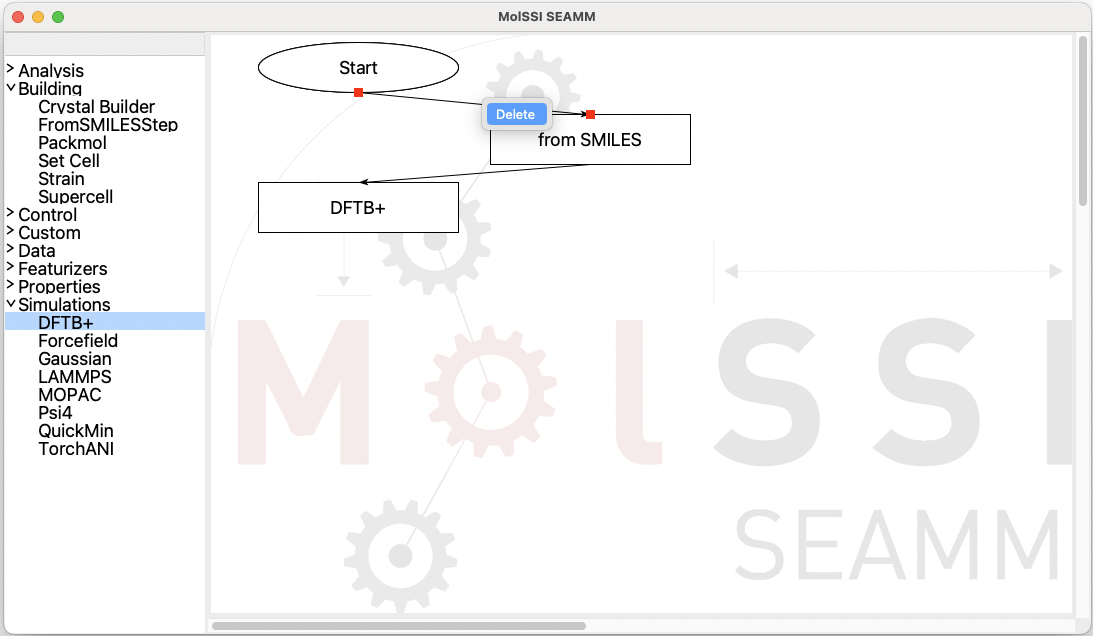
Disconnecting the ``from SMILES`` step#
Next add a control parameters step from the left pane, which is Parameters in the Control section:

Adding the control parameters step#
Now we need to connect it to the from SMILES step. When you put the mouse on the
Parameters step, small red dots appear on its frame. Move the mouse over the central dot
on the bottom of the rectangle. The dot will become much larger. Click the mouse and
drag to the top of the from SMILES step. As you go over the from SMILES step dots will
appear on its frame. Move the mouse and the arrow it is dragging over the center top dot,
which will become larger. When it does, release the mouse button. If the arrow
disappears you missed the dot. Try again! It should look like this:
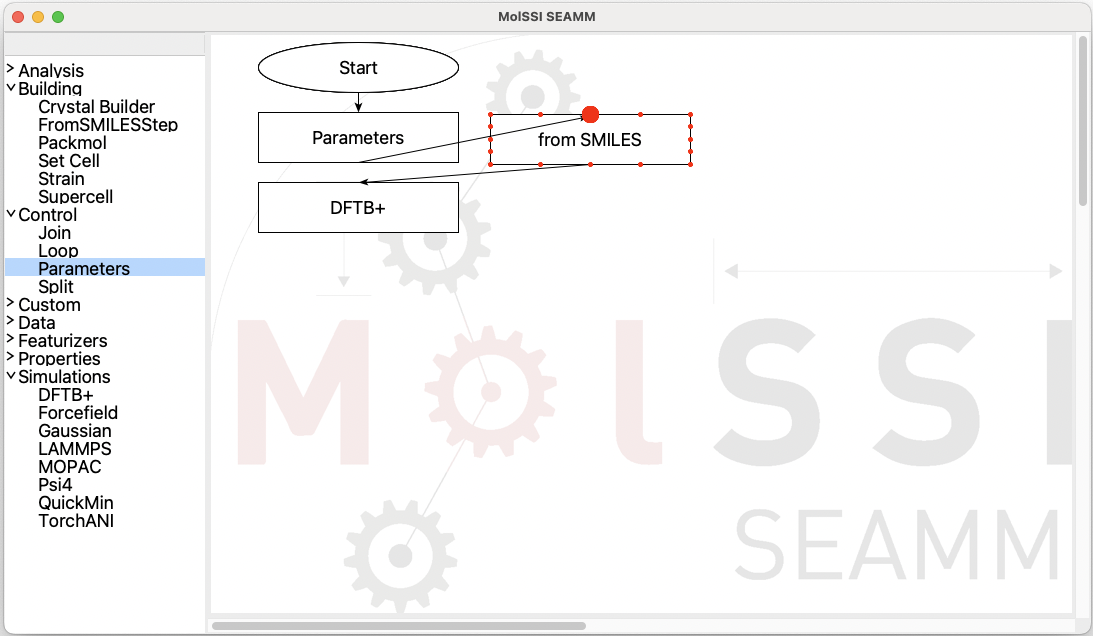
Connecting the Parameters and ``from SMILES`` steps#
Almost done! The flowchart will work as it is, but it is a bit ugly. You can drag the steps around to make it look nicer but there is an easier way. Go to the Edit menu and select Clean Layout or use the accelerator (⌘L on a Mac, ^L on Windows or Linux). That will snap the steps into place:
Flowchart after cleaning the layout#
That looks right! Now we need to set up and use the variable. Edit the Parameters
step – either double-click or right-click and select Edit…:
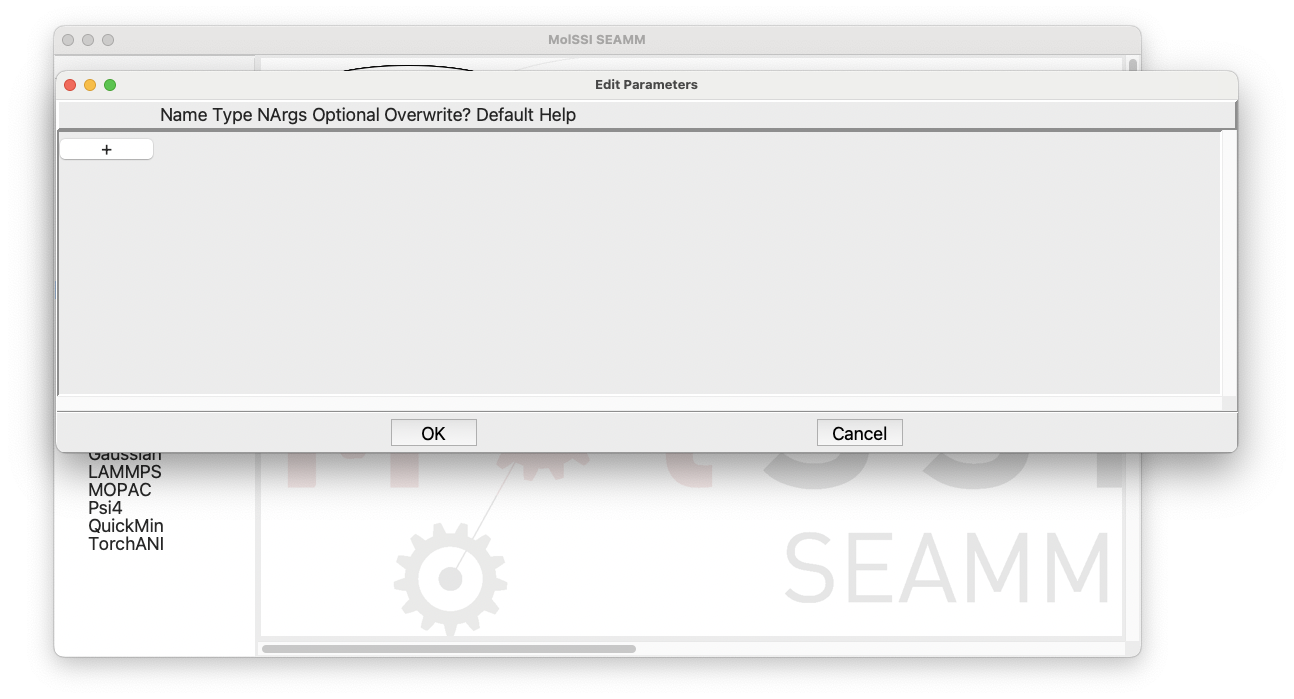
Editing the parameters#
Click the + sign to add another parameter, give it a name (“SMILES”), change the type to str, make it not optional, and give it some reasonable Help text:
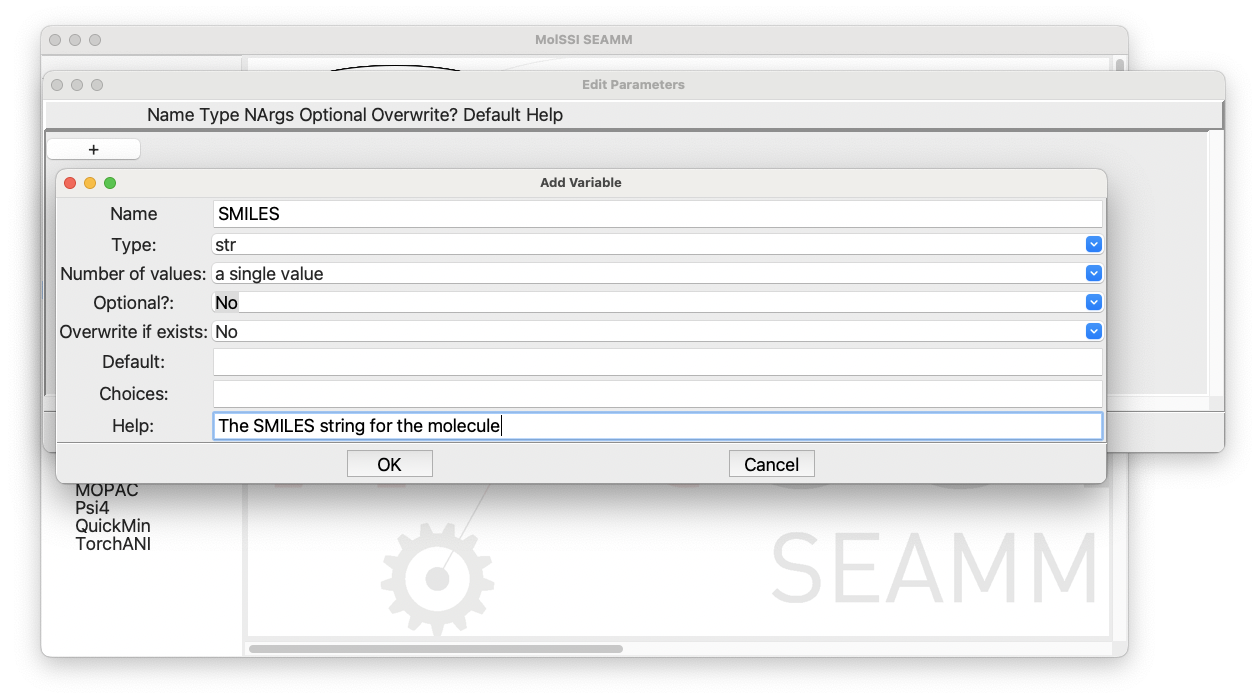
Creating a SMILES parameter#
Click on OK to close the dialog and add the parameter, and click OK again to close
the dialog for the Parameters step.
You have created a required parameter named SMILES. All that remains is to use it in
the from SMILES step, so edit that step:
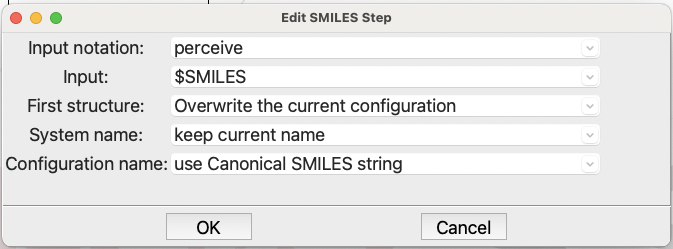
Using the new parameter in the ``from SMILES`` step#
Replace CCS in the Input: field with $SMILES. Note the dollar sign $, which indicates that this is a variable, not a string.
That’s it! The flowchart is ready.
Running the Job#
Now run another job (File / Run or ⌘R on a Mac, ^R on Windows or Linux):
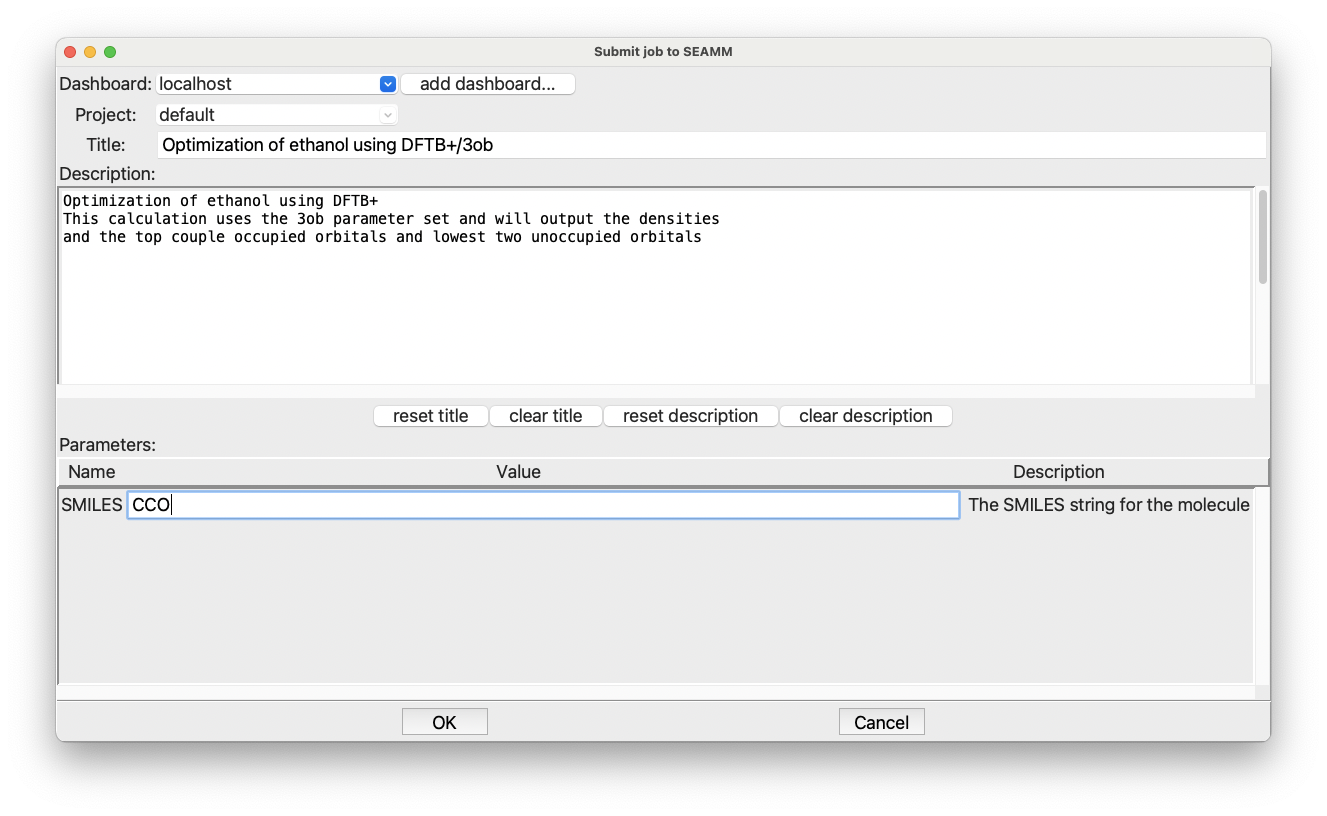
Setting parameters when submitting a job#
Note at the bottom of the dialog there is an entry field for putting in a value for the SMILES variable, with the helpful description that you gave. This time let’s run ethanol, so put CCO in the entry area, and adjust the title and description to reflect that you are running ethanol this time. Then click OK to run the job.
Head over to the Dashboard in your web browser and check that the job ran, and look at the results.
Topics Covered#
Dragging steps in a flowchart.
Removing and adding connections.
Defining parameters in the
Parameterstep.Using a variable.
Defining variables when submitting a job.