

1: A First Calculation#
Note
The flowchart for this tutorial is available at Zenodo and also can be directly loaded into SEAMM by opening from Zenodo.
Introduction#
This tutorial demonstrates how to create a very simple flowchart and execute its workflow. You need to have installed SEAMM and completed the initial setup of the Dashboard before starting this tutorial. If you haven’t done this yet, please go to Installing SEAMM and Managing the Dashboard first. Make sure the Dashboard and Job Server are running.
To get started, either double-click on the SEAMM app if you installed it, or open a terminal and activate the seamm conda environment and start SEAMM:
conda activate seamm
seamm
This will bring up a window like the one shown below:
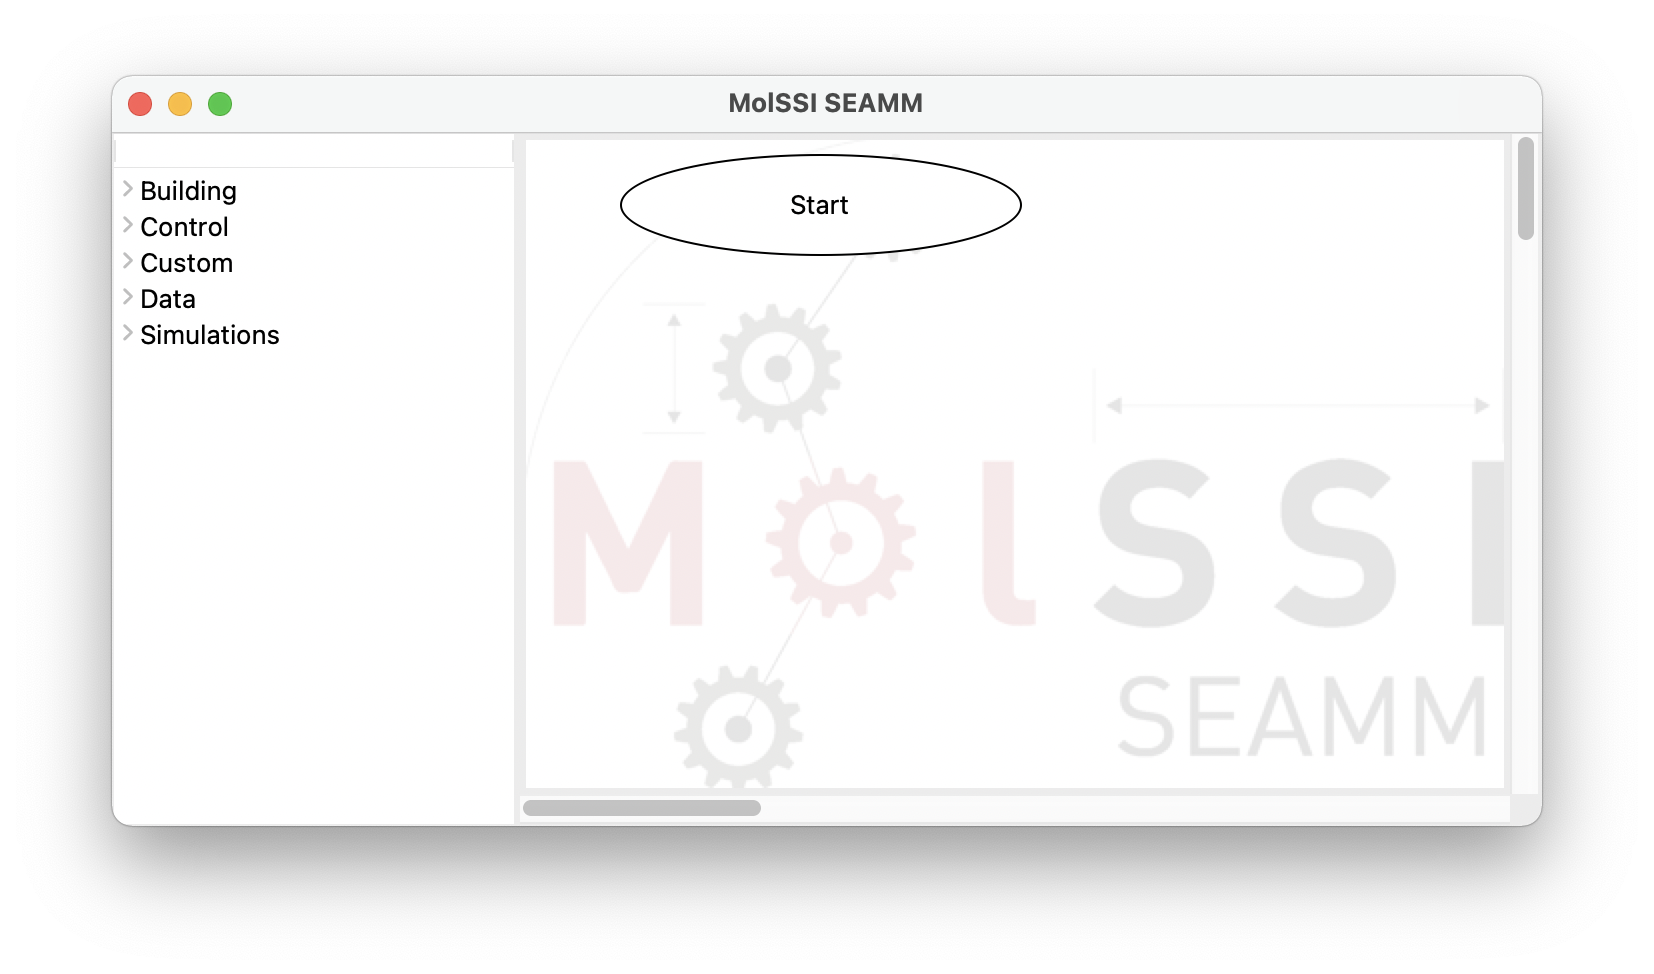
SEAMM initial window#
The window consists of two panes separated by a sash – the grey line. If you hover over the sash the cursor will change to a horizontal double-pointed arrow enabling the adjustment of the pane sizes. The left pane contains the list of available plug-in categories. Clicking on each category expands its content and represents it as a list of available plug-ins. Clicking on the same point on the screen will hide the expanded list:
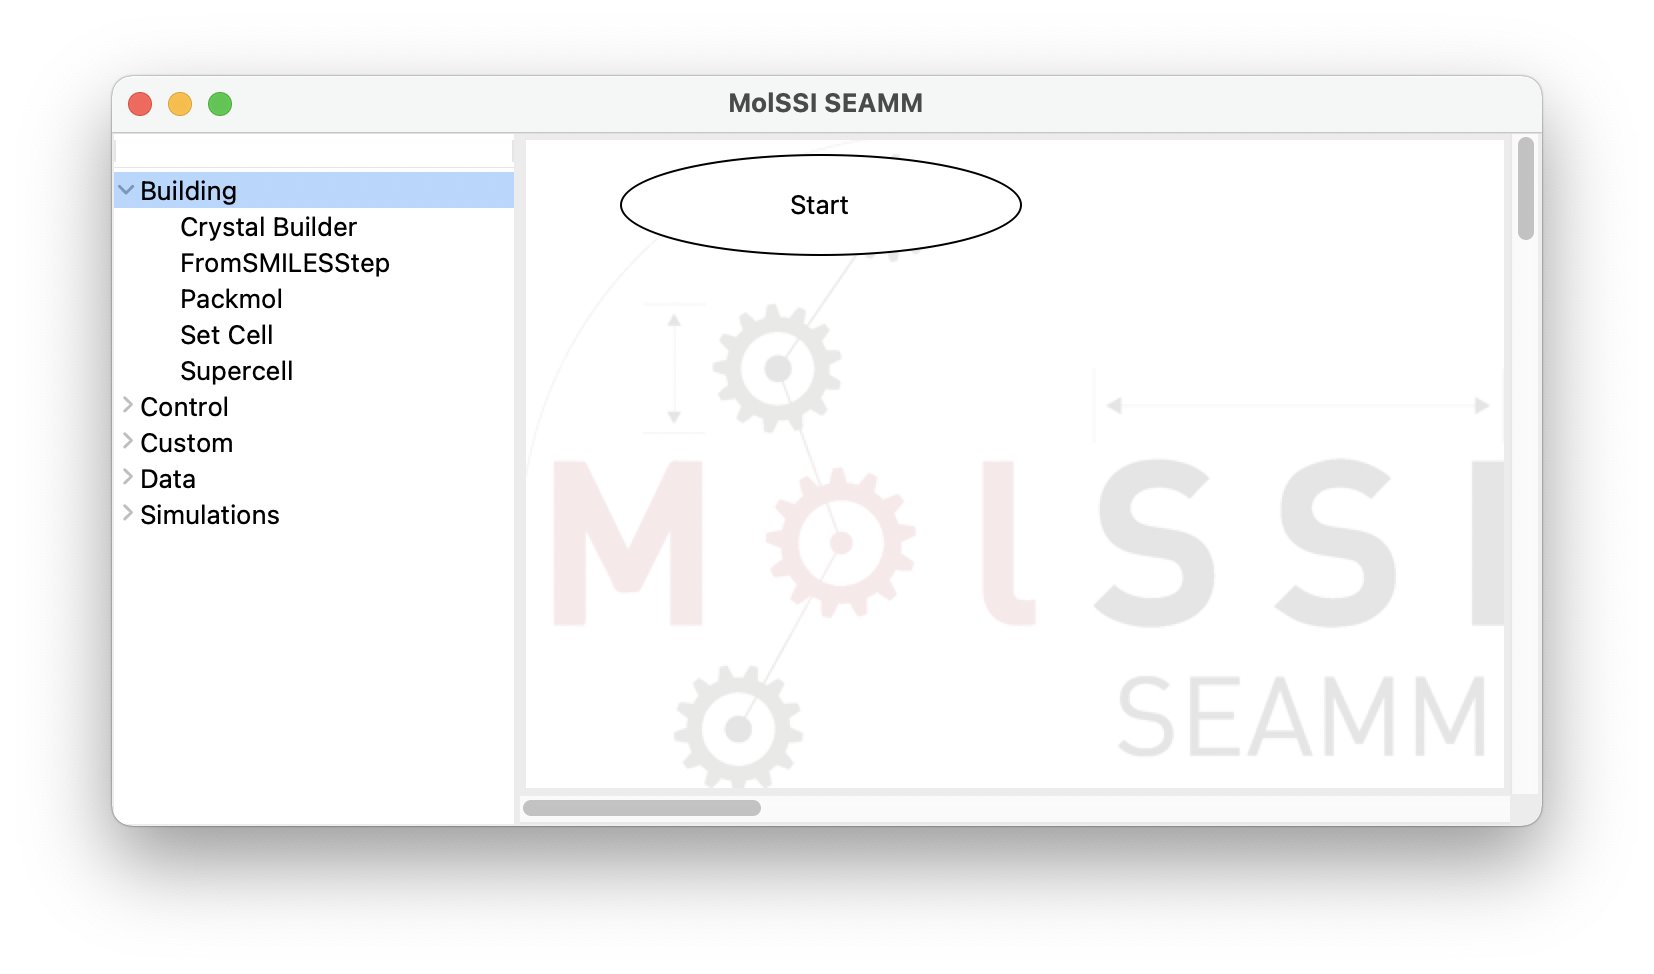
The SEAMM window with the Building category of plug-ins expanded#
The right-hand pane contains the initial step of a flowchart, Start. There must be one
and only one start step in a flowchart because this is where execution starts. Users
cannot delete or add a Start step.
Creating the Flowchart#
Let us create a simple flowchart and add a molecule to it using SMILES. SMILES is a specific representation of a chemical structures in the string format. Then, we add a new step, in which we optimize the geometry of the molecule, imported in the previous step, with a semi-empirical quantum chemistry method.
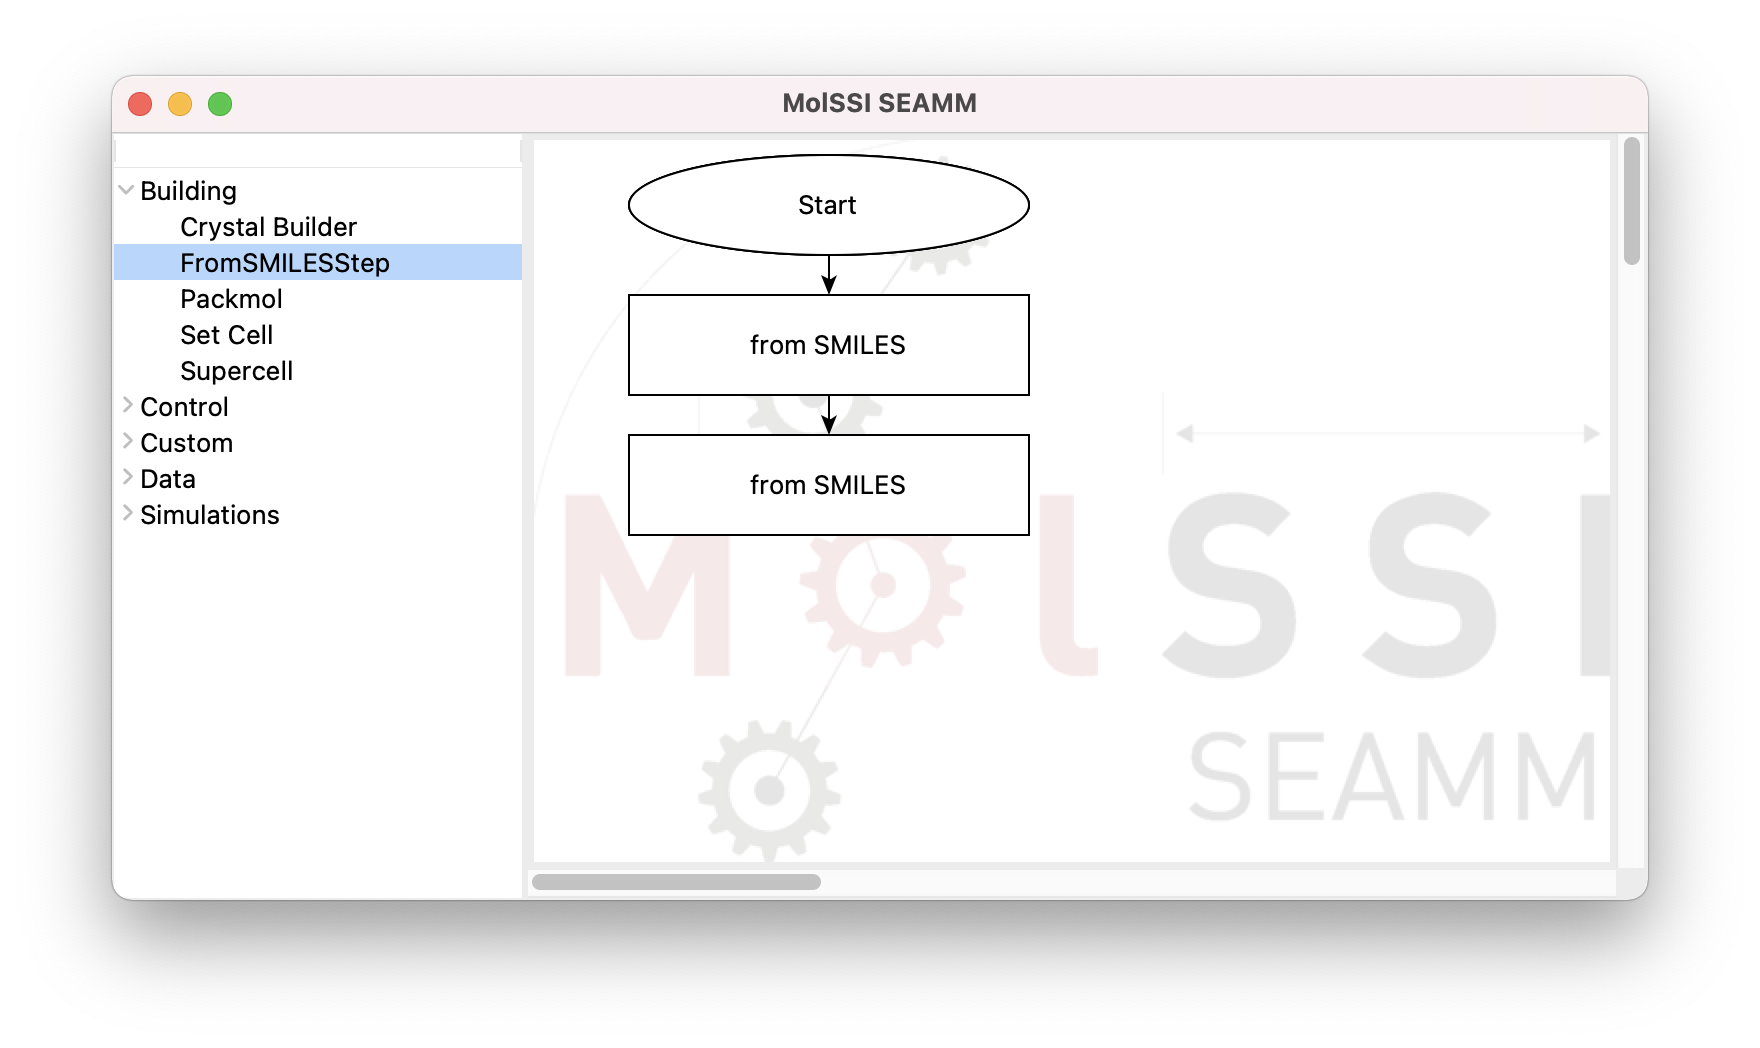
By clicking on the FromSmilesStep from the Building section, a rectangular box
for the new step labeled as from SMILES appears in the right pane. This box is also connected
to the Start step:

The flowchart after adding the FromSMILESStep#
If you have accidentally clicked twice on the FromSmilesStep or any other menu item that you
did not want, just right-click on the unwanted step and select delete from the pop-up menu:
Deleting a step from a flowchart#
In the next stage, we need to set the SMILES string variable for the added molecule. Almost every
step has a dialog window that allows the users to set parameters and control the details of the task
in each step of the workflow. In order to access the dialog, one can either right-click on the step box
and select Edit... from the menu or just double-click on the step box to open it:
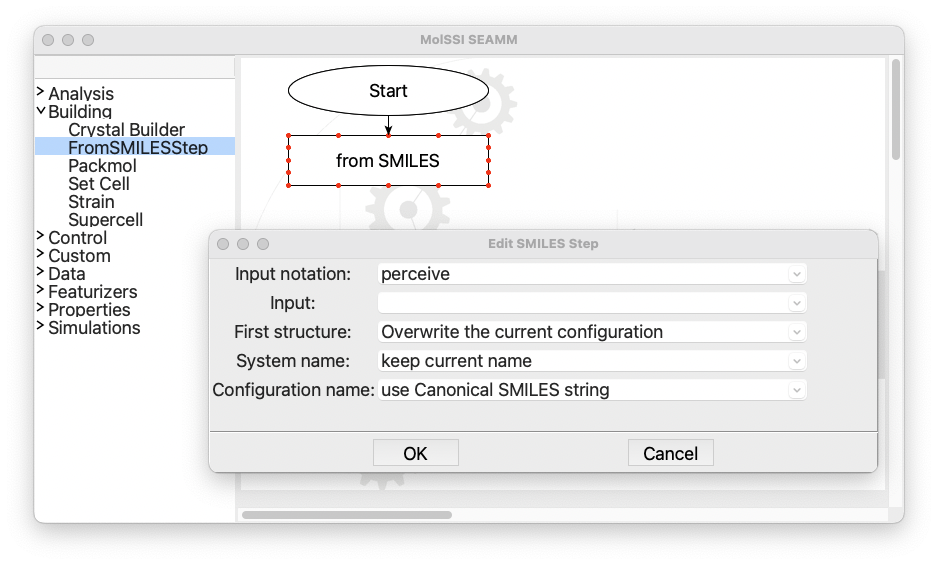
The dialog for the FromSMILES step#
Click in the field labeled Input: and type CCS, which is the SMILES representation
for ethanethiol. Leave everything else as is and click on the OK button:
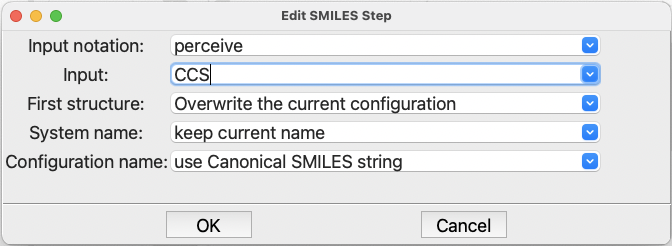
The completed dialog for the FromSMILES step#
Note
While the name FromSMILES suggests that you need to enter SMILES, it has been
enhanced over time to also handle InChI and InChIKeys. The first pulldown allows you
to specifiy which you are entering; however, perceive will typically correctly
understand the text that you typed in.
You can also change how to store the new structure and the name of the system and configuration it is stored in, but for now just use the defaults.
Now, open the Simulations section in the left panel and add a DFTB+ step:
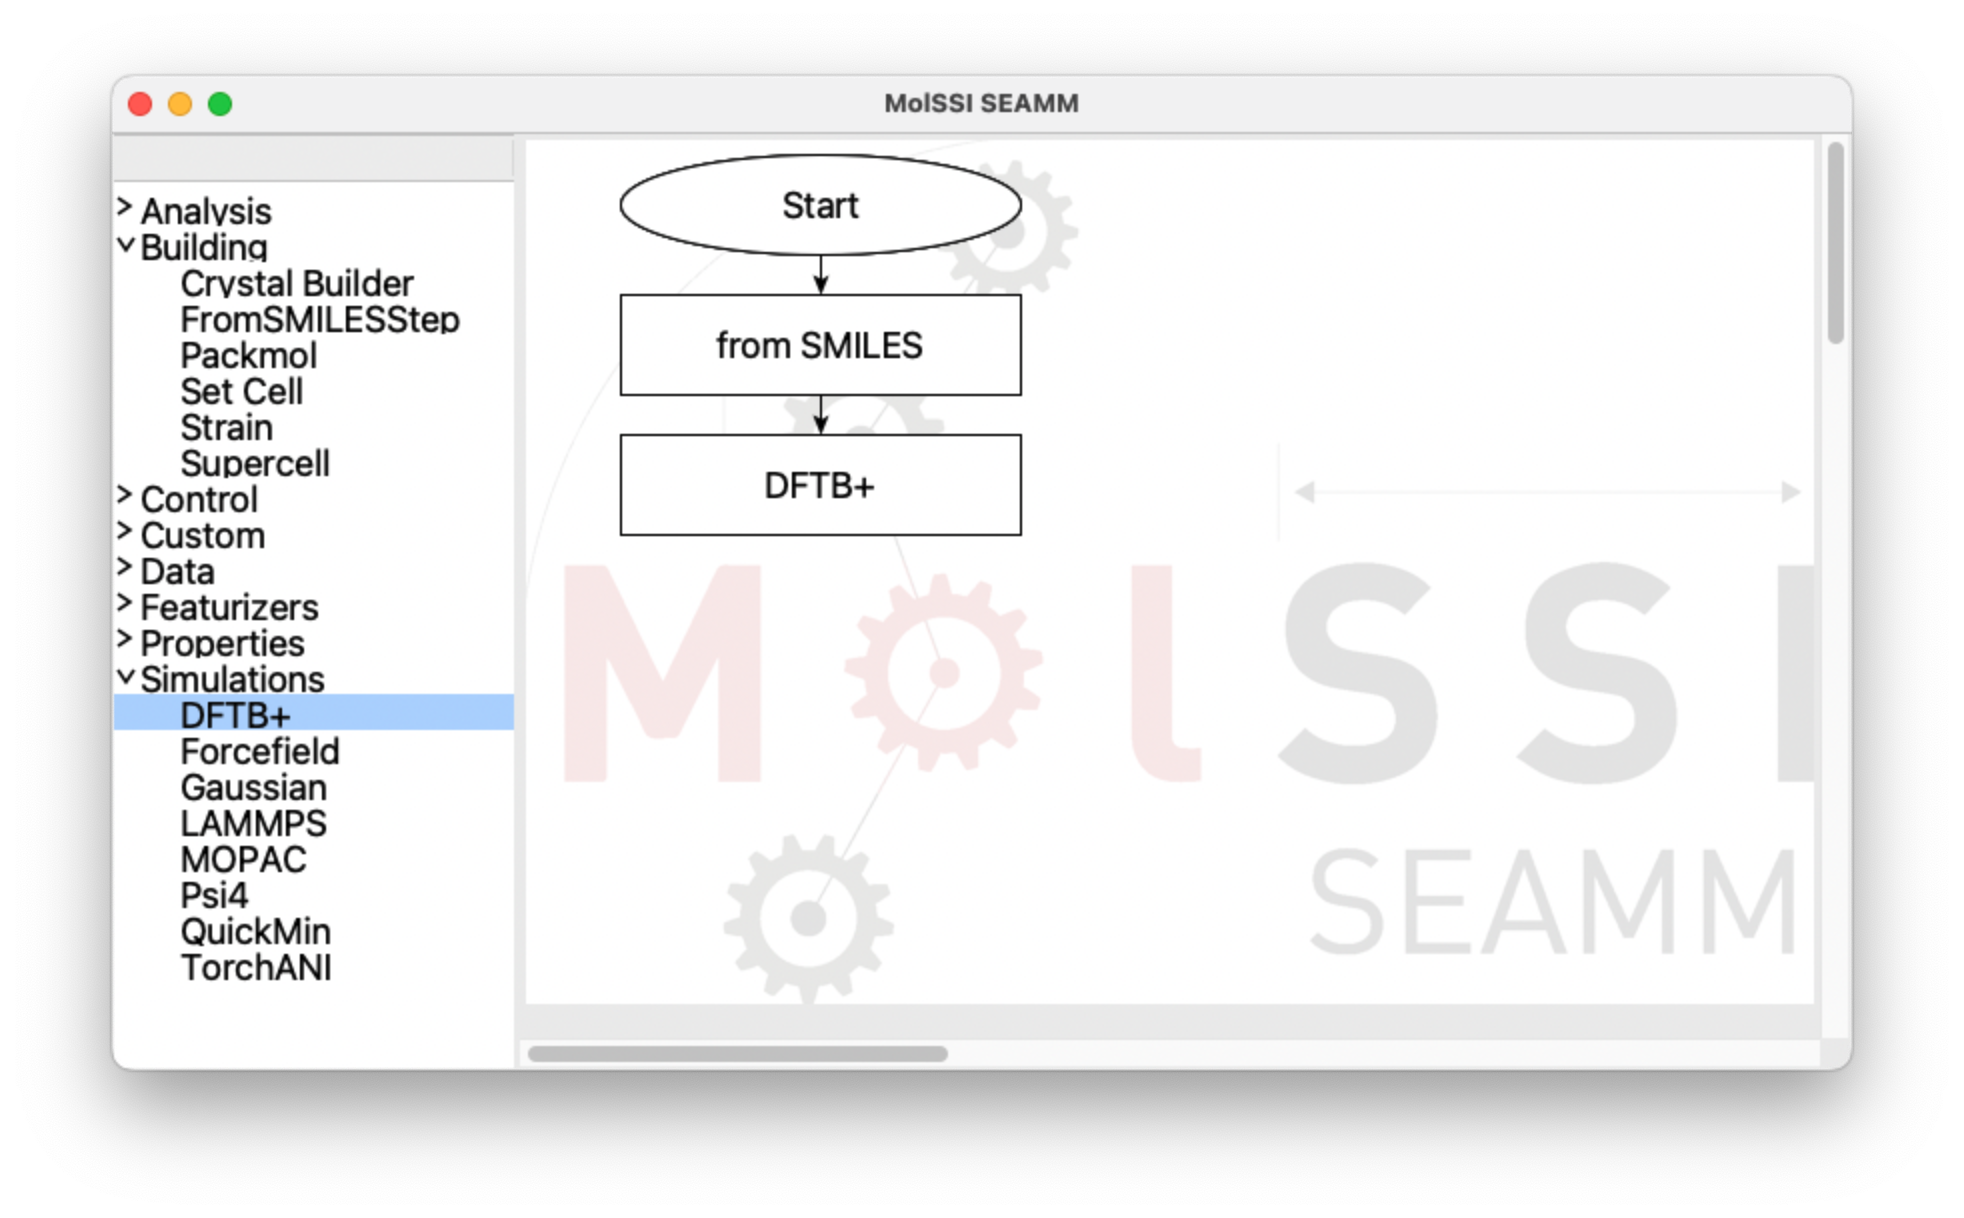
The flowchart with the DFTB+ step added#
Then, open the dialog for the DFTB+ step:
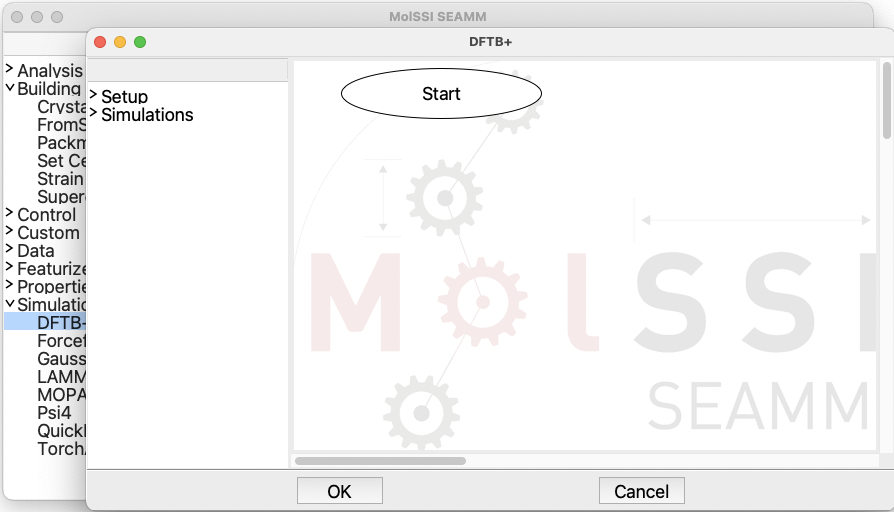
The dialog for the DFTB+ step#
Note that this dialog looks like the main SEAMM window. Some steps, like the FromSMILES
step, perform one task and thus, can be handled by a single dialog. However, many
simulation codes such as DFTB+ are capable of performing multiple tasks and often have
their own syntax. Open the Setup and then the Simulation sections on the left
panel in order and add the ChooseParameters and the Optimization steps in the
same order:
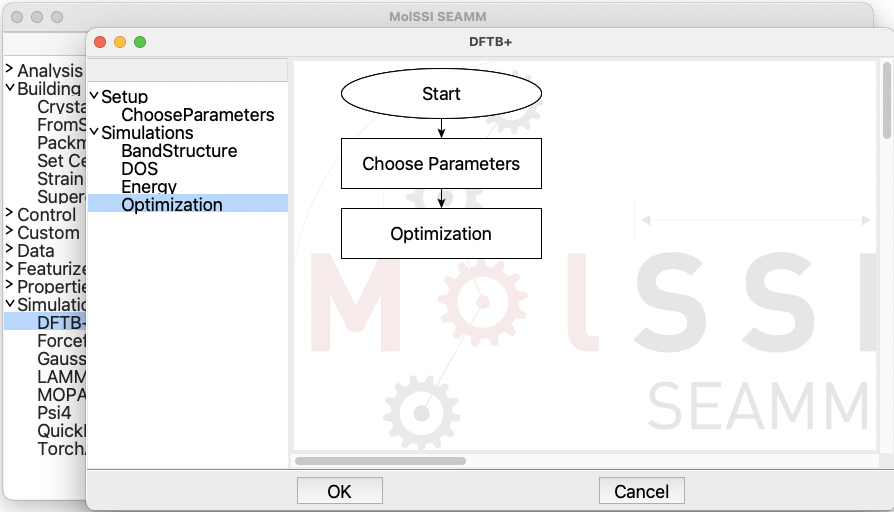
The flowchart for DFTB+#
Open the dialog for the ChooseParameters step by double-clicking on it:
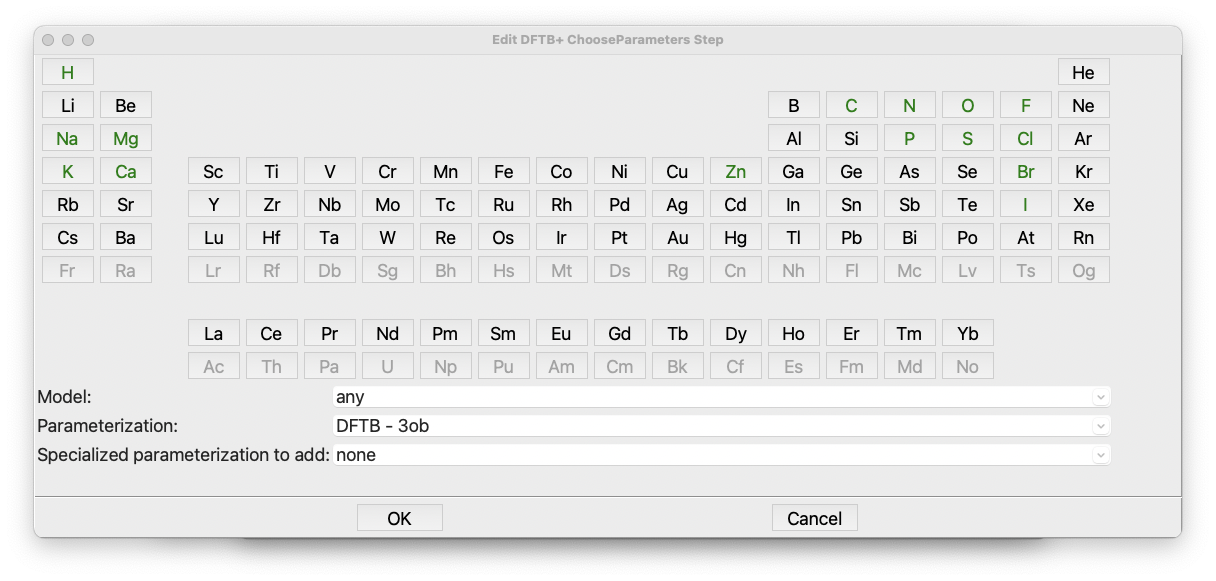
The dialog for the DFTB+ ChooseParameters step#
The ChooseParameters dialog is quite a large and complex, but at least it is a
periodic table!
A short description of how DFTB+ works is in order. DFTB+ is a semiempirical quantum chemistry code. It uses parameterized Slater-Koster functions for each atom. However, several parameterizations are available to choose from. These datasets are listed in the pull-down button near the bottom for the dialog window that is currently opened. Some of the datasets have additional add-on datasets that either add more elements to the existing sets or are tuned for different systems and properties. More information about the parameter sets can be found in the DFTB website.
There are currently two types of parameters available for DFTB+: the DFTB
parameters noted above, and the xTB parameters (eXtended Tight Binding), which
involve a lsightly different approximation. The first pulldown in the dialog lets you
select which type of parameters you want to use, with the default being any.
Unfortunately, the parameterizations often cover only some elements, so you need
to find an appropriate dataset that can handle all elements of interest. The
ChooseParameters dialog offers two ways to find the appropriate parameters set.
In the first approach, when a dataset and perhaps an auxiliary dataset is selected from the
three pull-downs at the bottom of the dialog, the supported elements within the periodic
table are automatically highlighted in green. The default dataset, ob3, can handle a list of
elements including H, C, N, O, F, Na, Mg, P, S, Cl, Zn, Br, I, and Ca, which would be suitable
for our ethanethiol example as well as a wide range of organic molecules.
In the second approach, one can select the desired set of elements, say, H, C, N, O, S, and Zn. Then, check the drop-down button at the bottom of the dialog to see what choices are available for the selected set of elements:
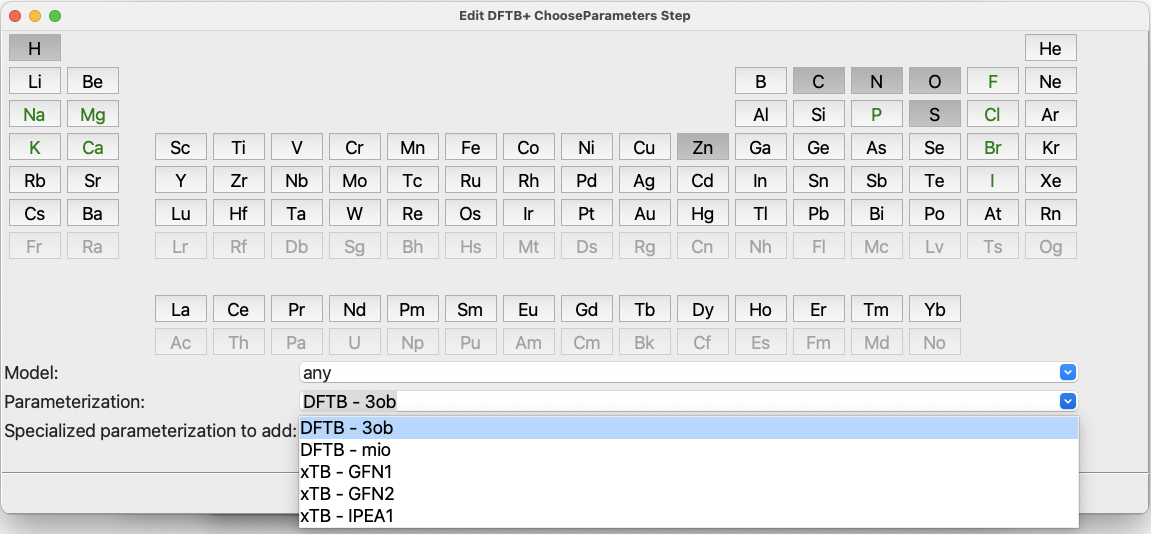
The ChooseParameters dialog with elements selected#
For our selected set of elements mentioned above, only the DFTB datasets 3ob and
mio and the three xTB datasets provide global support. Let us keep the default
dataset, 3ob, because it is the newest and one of the most general datasets.
Now, we are going to take a look at the Optimization dialog:
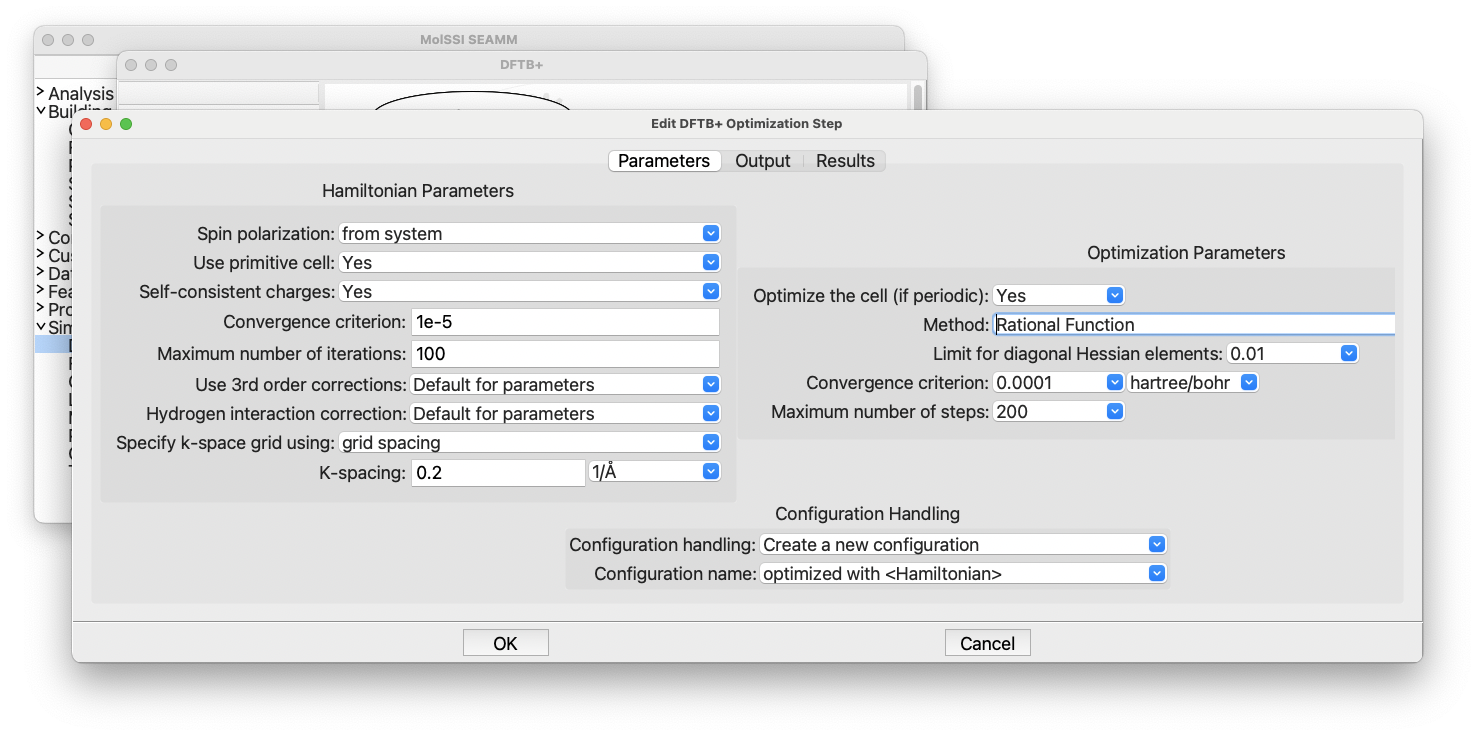
The DFTB+ Optimization dialog#
There are certainly a lot of choices available. On the left side of the dialog, there are options for controlling the Hamiltonian and the physical approximations being made. The right-hand side of the dialog consists of parameters for controlling the geometry optimization procedure. SEAMM strives to have reasonable default values so let’s just use the defaults.
Note
DFTB+ and several other codes in SEAMM can handle both molecular and periodic systems, which is why you see options for using the primitive cell, the k-space integration grid, and whether to optimize the cell. These are ignored for molecular systems – there is no cell – but allow you to create flowcharts that can work with both molecular and periodic systems.
Before leaving the dialog, click on the Output tab at the top of the dialog:
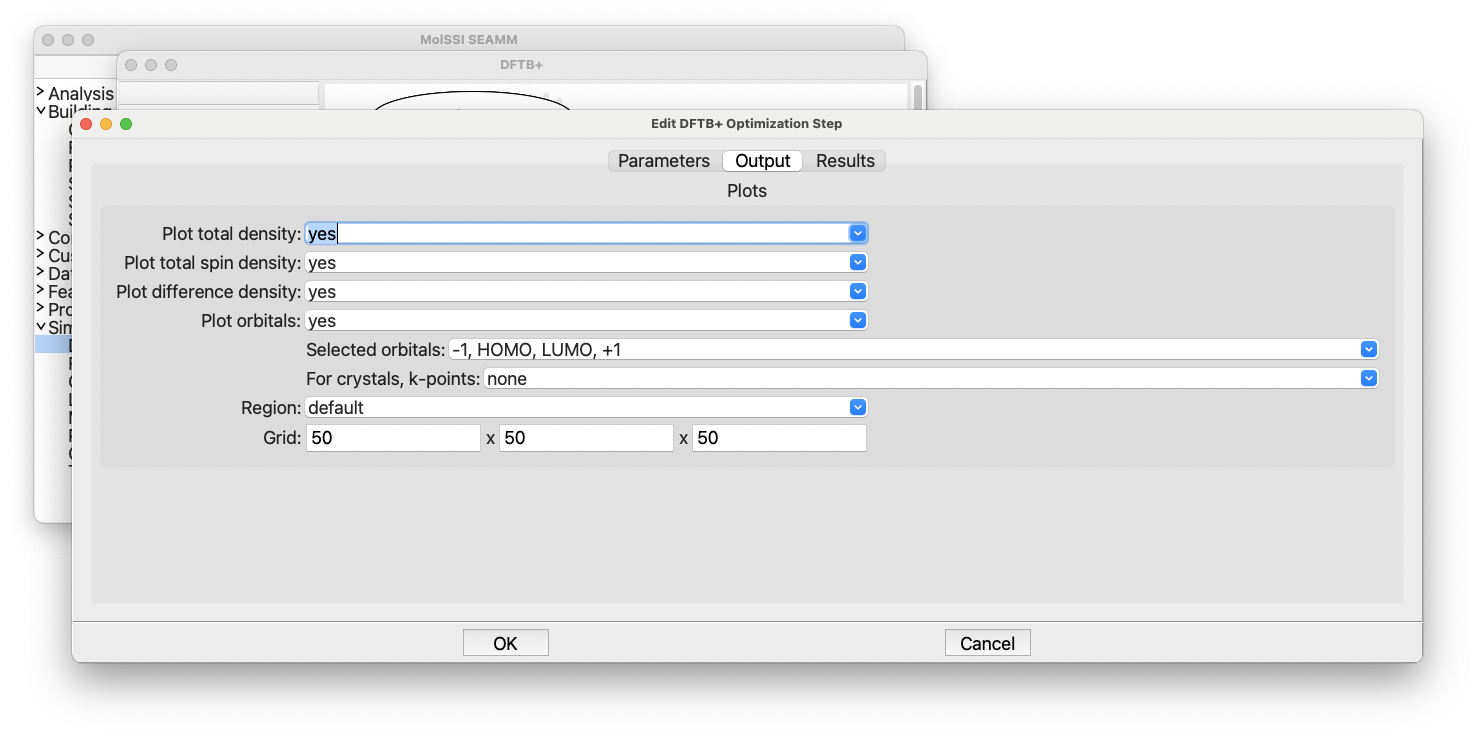
The DFTB+ Optimization dialog, output tab#
This is where you control plotting the total charge density, spin-density (for
spin-polarized calculations), and orbitals. By default it will plot all the densities
plus the HOMO and LUMO orbitals as well as the next orbital below the HOMO (-1) and the
next orbital above the LUMO (+1). Again you see some controls for periodic systems,
which you can ignore. The defaults are fine, so click Cancel to close the dialog with
no changes.
Tip
If you do not intend to make any changes in a dialog, it is a good idea to close it with
the Cancel button. It is a common habit to click OK, but pressing OK
saves any changes including ones you made accidentally by e.g. looking at the options
in a pulldown. Such a mistake can lead to a calculation that you didn’t intend, with
puzzling results. We recommend using the Cancel button in any dialog in SEAMM or
any other program unless you actually want to make changes. It is a good habit to get
into.
Click OK to close the DFTB+ dialog to save your changes.
Running the Job#
To submit the flowchart as a Job, click on the File menu and select Run or use
the accelerator (⌘R on a Mac, ^R on Windows or Linux) to get the following dialog:
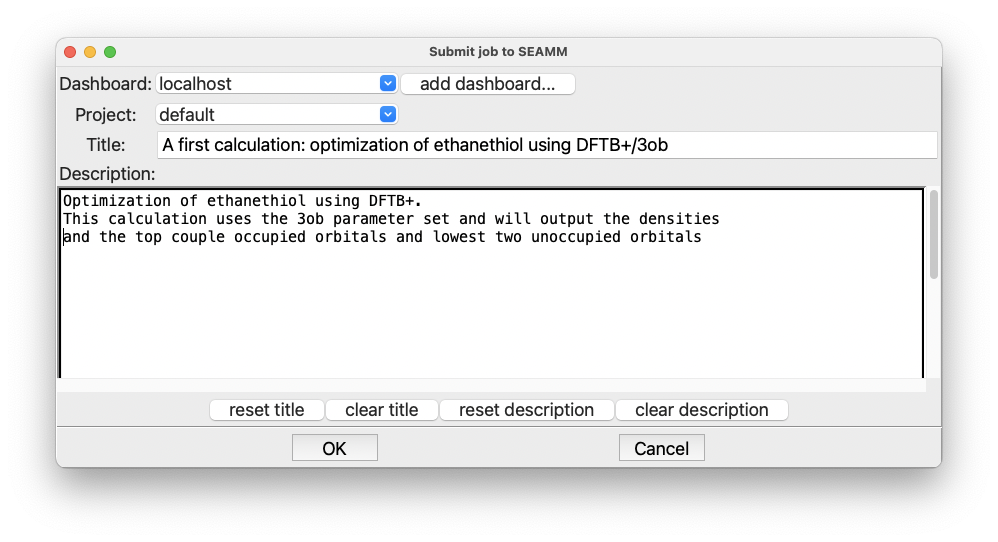
The Run dialog in SEAMM#
Note
The very first time you run, you will need to provide a username and password for the Dashboard. If so, this dialog will appear first:

The login information for the Dashboard#
If you don’t know your username and password go to Managing the Dashboard and then come back here.
Add a useful title in the Title field. Briefly describe your goal and the details of
your simulation workflow within the large text area at the bottom of the
dialog. Finally, click OK to execute the calculation.
The next tutorial will show you how to look at your job and its results in the Dashboard.
Topics Covered#
Adding steps to a flowchart.
Editing the parameters for the steps.
Submitting a job.