

Getting Started#
Installation#
The QCArchive step is probably already installed in your SEAMM environment, but if not or if you wish to check, follow the directions for the SEAMM Installer. The graphical installer is the easiest to use. In the SEAMM conda environment, simply type:
seamm-installer
or use the shortcut if you installed one. Switch to the second tab, Components, and check for qcarchive-step. If it is not installed, or can be updated, check the box next to it and click Install selected or Update selected as appropriate.
The non-graphical installer is also straightforward:
seamm-installer install --update qcarchive-step
will ensure both that it is installed and up-to-date.
Example#
To use QCArchive you need to have a file ~/.qca/qcportal_config.yaml containing the address of the QCArchive server you are using and your credentials:
address: https://validation.qcarchive.molssi.org
username: <username>
password: <password>
where <username> is your user name and <password>, password.
Once you have that file, you can use the QCArchive step to work with datasets in
QCArchive. For example, this flowchart reads the
structures from a dataset and optimizes them with MOPAC.
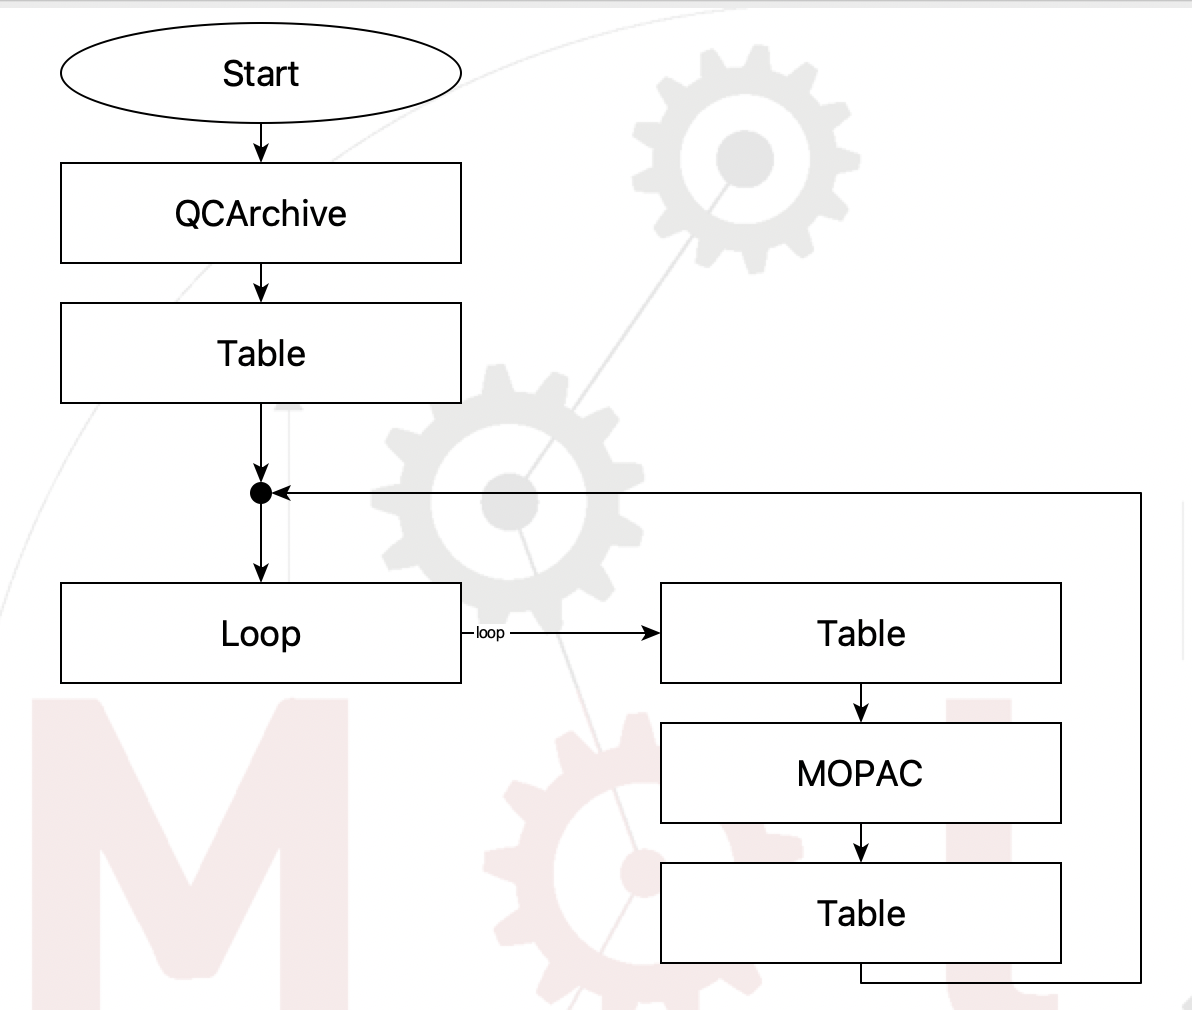
Flowchart to read a dataset from QCArchive#
The QCArchive step is the key to this flowchart. The rest simply creates a table for results, loops over the structures from the dataset optimizing them with PM7 in MOPAC and adding the results to the table. The setup for the QCArchive step is this:
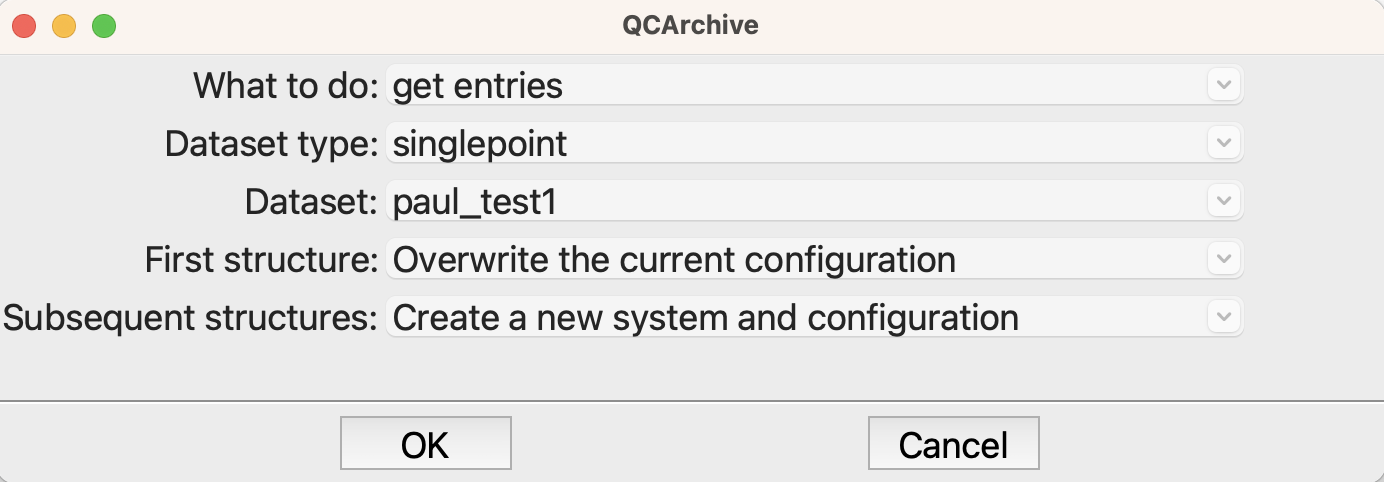
The options for the QCArchive step#
You will need to change the name of the dataset and possible its type as well.
That should be enough to get started. For more detail about the functionality in this plug-in, see the User Guide.